


Fortune Teller Box
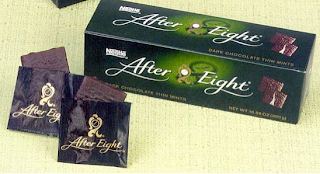
I have always enjoyed creating. Drawing, sewing, sculpting... anything! I especially enjoy what is now called "upcycling" — finding new uses for discarded objects. For example, this was once a box of AfterEight chocolates but now, instead of selecting a chocolate from the box, you select a fortune!
If you would like to make a Fortune Teller box of your own, here are the instructions (sorry I don't have any step-by-step pics as I made this one quite some time ago and never thought to document the process! When I make another one I will be sure to do that):
Materials:
- An empty box of AfterEight chocolates (but keep the little envelopes the chocolates come in —you'll need those!)
- Acrylic paint and acrylic paint sealer
- Paper (preferably card stock)
- Stamps, markers, stickers and any other fun stuff you have around that you can use to create each "fortune"
- Glue
Instructions:
1. Get yourself a box of AfterEight chocolates.
2. Remove the chocolates from their little envelopes (but keep the envelopes!!). I suggest you don't perform this step all at once! :o)
3. Paint the box any colour you like. Dark colours work best as the paint needs to totally cover the wording on the box. You may need more than one coat (allow each coat to dry completely before applying the next). Allow the paint to dry over-night.
4. Meantime, to replace the chocolates, cut out square pieces of paper that will fit inside the little envelopes the chocolates came in. Make one for every envelope.
5. Now the fun begins! Use stamps, markers, stickers, paper embellishments — anything you have that you'd like to use for each fortune. I used stamps with words like "create", "dream","love" & "happiness" on them. I created this fortune box for a friend and I wanted it to be all about positive thinking and uplifting sentiments... but you could choose any theme you'd like. You could make a fortune box for Valentines Day and write something you love about your mate on each card, or make one for a special birthday and write something that happened the year/day your friend was born on each card (e.g. #1 song, Best Movie at the Oscars that year, famous people who share the birthday). You can embellish one side of the fortune or both sides — have fun and be creative! The possibilities are endless!
6. Cut three pieces of card stock that are just a bit smaller than the long sides of the box, and two square pieces that are a bit smaller than the ends. This is where you'll write (or you can use your computer and printer) the instructions for your "Fortune Teller".
The top of this one I made says:
Get Ready! Get Set! to Choose Your Destiny!
(well, for today anyways!)
The side panels say:
Pick a card from the box…
you can dream it! you can do it!
The end panels say:
Let Your Day Begin!
8. Glue the paper "panels" you've made to the top, sides and end of the box. Allow glue to dry.
9. Coat the entire box with acrylic sealer (again, you may want to apply more than one coat).
10. Fill the envelopes with the fortunes you made and place them in the box. Your done!
Give your gift to the lucky recipient (which could be YOU of course!)
Have fun!


